Instruction Manual
We developed the Open-NVM platform in a Windows 7 environment.
Apparatus
The whole scheme has been evolved with the main apparatus of:
- FPGA Development Boards: Configured for NVM Memory Controller.
- Daughter Board: PCB to Connect NVM with Controller.
- PC/Laptop: i) For Configuring FPGA ii) Providing Host-Apps for User-interactive-mode.
Not to mention, we will also need: - Accessories (PC-peripherrals)
- Connectors (USB, VHDCI etc)
FPGA Code
Required Tools
- Xilinx ISE: For using with Nexys 3 board. In our case, we've developed with WebPACK edition.
- Digilent Adept: For downloading Verilog compiled(synthesized) binary image to Nexys 3 board.
Connection of the Nexys 3 board
- Connect both of USB connectors to PC.
- JTAG download port
- USB-to-Serial port
- Note the COM port number of USB-to-Serial from 'Device Manager' of your system.
- Connect both of USB connectors to PC.
Usage
- Launch the Project Navigator tool.
- Create a project for Nexys 3 board configuration.
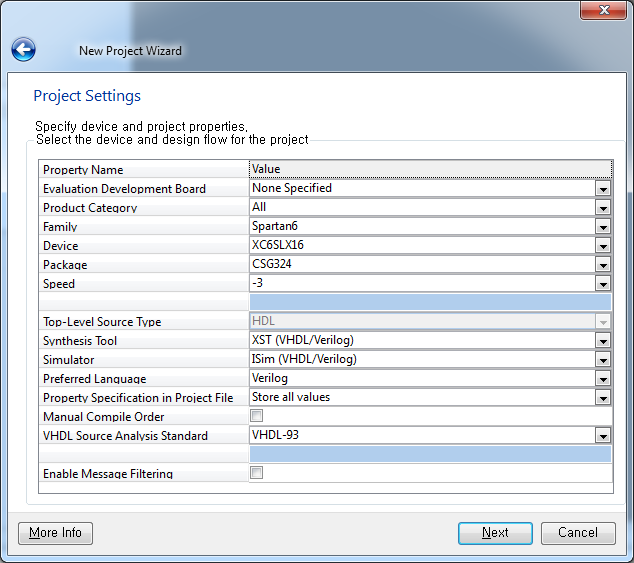
- Add Verilog source files(.v) into the project.
- Execute Generate Program file in 'Design' window.
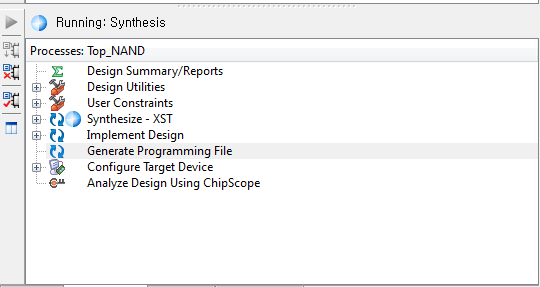
- Download Program file (.bit) to Nexys 3 board by using Digilent Adept.
- 7-segment will show the number after downloading.
- Use the host controller application.
Controller Code
Required Tools
- Python 2.7.x: Python interpreter
- pySerial: Serial port library for Python
- tk: tk library is already included in Python 2.7, used for simple GUI
Usage
Edit ofserial.cfg for serial COM port number and script file name.
global_config = {
    'COM_PORT' : 'COM5',
    'CMD_FILE' : 'POWER_ER.act'
}
Edit script file for operation
actions = [
    {
        'NAME' : 'cap_0E-ALL',
        'CMDS' : [
                    uADDR(0x0F8,0x0FF),
                    uOPER(oWR=False, oRD=False, oER=True, oRST=True),
                    uLOOP(1),
                    uLOG(0),
                    uNAND(pLSB=True, pCSB=True, pMSB=True),
                    uSTART() ]
    },
    {
        'NAME' : 'cap_0R-FF-ALL',
        'CMDS' : [
                    uADDR(0x0F8,0x0FF),
                    uOPER(oWR=False, oRD=True, oER=False, oRST=True),
                    uLOOP(1),
                    uLOG(0),
                    uNAND(pLSB=True, pCSB=True, pMSB=True, ptrn_usr0=1, ptrn_usr1=1, ptrn0=0xFF, ptrn1=0xFF),
                    uSTART() ]
    },
]
Run - GUI version
python ofserial_tk.pyGUI Usage
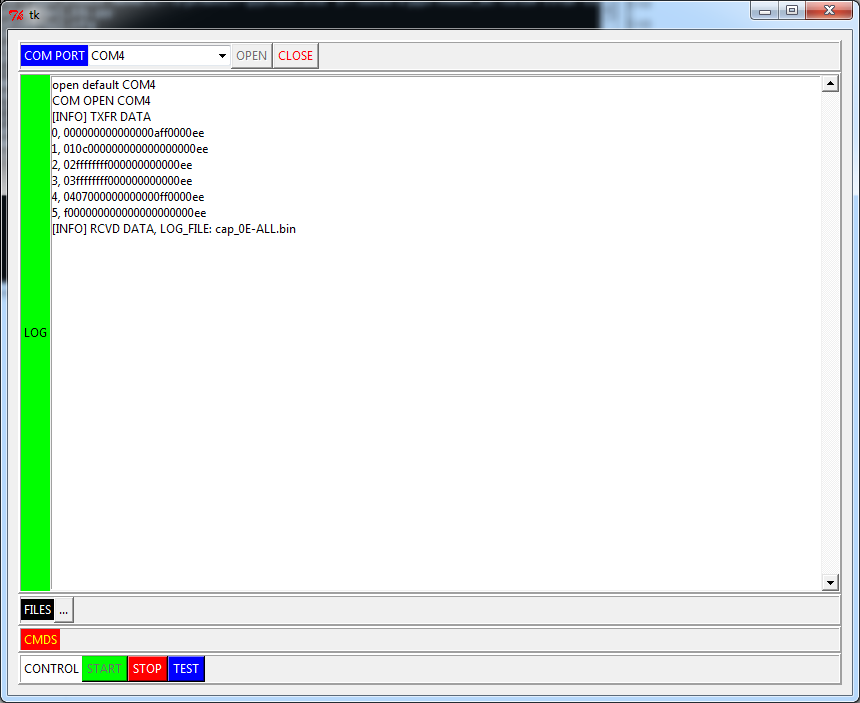
- COM PORT: COM port selection and OPEN/CLOSE the port. If port is available, it is automatically opened on launch.
- LOG: Log window. After running the full script, [Finish] is shown here. This is different from the output log file.
- FILES: (not yet implemented) Script file selection.
- CMDS: (not yet implemented) Script editor.
- CONTROL
- START: Start the script.
- STOP: (not working yet) Terminate the current running.
- TEST: (just testing button for GUI development)
Tips
- There is also command line based script file ofserial.py which we used in initial stage of development.
- For debugging for serial communication, we used a serial port monitoring tool Realterm which is also an open sourced project.
Script file grammar
- Every dictionary in actions array are executed and result are saved to log files.
- 'NAME': Log file name for saving capture result
- 'CMDS': Series of actions for setting the configuration or doing action
Type Description Parameters uADDR() Address Range (Start_Address, End_Address)
NAND: Block Address
MRAM: Byte AddressuOPER() Operation Filter oWR: Write
oRD: Read
oER:Erase
oRST:ResetuLOOP() Loop Count NAND: Block Address uLOG() Log Frequency How frequently FPGA will return result
0=return every resultuNAND() NAND Options pLSB/pCSB/pMSB: Filter page type for doing operations
ptrn_usrX: True=(user data pattern), False=(column address as data pattern)
ptrn_usr0 is applied to even page, and ptrn_usr1 is applied to odd pageuSTART() Start Testing Start the testing with above settings
Log Parser
- Required Tools
- Python 2.7.x: Python interpreter
Usage
Run the parser for log file(s).
python log_parser.py log_file.binWe also attached a sample batch file(parse.bat) for windows. You can easily parse the files by dragging logfiles onto this batch file.
Edit the path in batchfile before using it.
C:\Python27\python.exe D:\MyProject\log_parse.py %*
Log file
- For details of log file, please refer to packet structure.
- After parsing, log file is saved as .csv format.
- Basically, we used the Microsoft Excel for further analysis of parsed data.